Recently I’ve been using Cake to automate code deployments to Windows and Ubuntu devices.
Since .NET Core 2 became available, I’ve been able to write C# applications to work with devices which can host different operating systems – specifically the Raspberry Pi, where I’ve been targeting both Windows 10 IoT Core and Ubuntu 16.04 ARM.
I can deploy my code to hardware and test it there because I own a couple of Pi devices – each running one of the operating systems mentioned above. Each operating system requires code to be deployed in different ways:
- The Windows 10 IoT Core device just appears on my home workgroup as another network location, and it’s easy to deploy the applications by copying files from my Windows development machine to a network share location.
- For Ubuntu 16.04 ARM, it’s a bit more complicated – I need to use the PuTTY secure client program (PSCP) to get files from my Windows development machine to the device running Ubuntu, and then use Plink to make application files executable.
But I’ve not really been happy with how I’ve automated code deployment to these devices. I’ve used Powershell scripts to manage the deployment – the scripts work fine, but I find there’s a bit of friction when jumping from programming C# to Powershell, and some of dependencies between scripts are not really intuitive.
It’s also a bit difficult to explain to people how to use the scripts, and that’s always a sure sign of a code smell.
Recently I’ve found a better way to manage my build and deployment tasks. At my local .NET user group, we had a demonstration of Cake which is a tool that allows me to orchestrate my build and deployment process in C#. It looked like it could help remove some of my deployment issues – and I’ve written about my experiences with it below.
Getting started
There’s lots more detail on how to get started in the CakeBuild.net website here, but I’ll run through the process that I followed.
Create a project
I’ve previously created a simple project template for a Raspberry Pi which is in a custom nuget package (I’ve written more about that here). You can install the template from nuget by running the command below.
dotnet new -i RaspberryPi.Template::*
This creates a simple hello world application targeting the .NET Core 2 framework.
dotnet new coreiot -n SamplePi
You don’t have to create a project for a Raspberry Pi to follow along with this post – you could just use the regular dotnet command for a new console project:
dotnet new console -n HelloWorld
Create the bootstrapper script
After the project was created, I opened the project folder in VSCode, opened the Powershell terminal, and ran the code below.
Invoke-WebRequest http://cakebuild.net/download/bootstrapper/windows -OutFile build.ps1
This creates a new file in the root of my project called “build.ps1“. It won’t do anything useful yet until we’ve defined our build and deployment process (which we’ll do in the next few sections) – but this bootstrapping script takes care of lots of clever things for us later. It verifies our build script compiles, and it’ll automatically pull down any library and plugin dependencies we need.
Create a Cake build script
The build script – called build.cake – will contain all of the logic and steps needed to build and deploy my code. There’s already an example repository on GitHub which has a few common tasks already. Let’s use the script in that sample repository as our starting point and download it to our project using the PowerShell script below.
Invoke-WebRequest https://raw.githubusercontent.com/cake-build/example/master/build.cake -OutFile build.cake
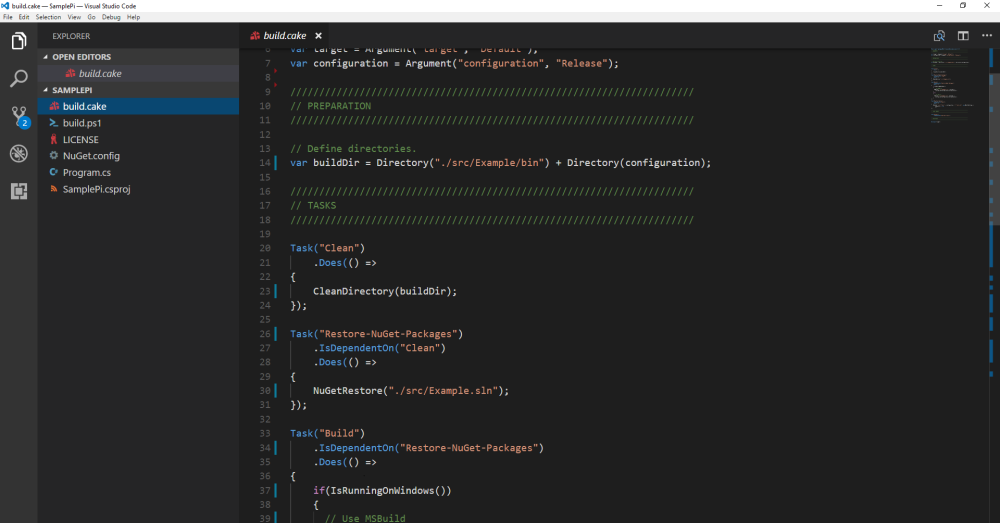
At this point, if you’re using VSCode, your project should look something like the image below.
Once you’ve loaded the example project’s build script – you can see it here – there’s a few things worth noting:
- The build script uses C# (or more specifically, a C# domain specific language). This means there’s less friction between creating functional code in C# and orchestrating a build and deployment process in Cake. If you can write code in C#, you’ve got all the skills necessary to build and deploy your code using Cake.
- Each section of the build and deployment process is nicely separated into logical modules, and it’s really clear for each step what tasks need to complete before that step can start. And because the code written in a fluent style, this means that clarity is already baked into the code.
- The script shows how we can process arguments passed to the build script:
var target = Argument("target", "Default");
The Argument method defines a couple of things:
- “target” is the name of the parameter passed to the build.ps1 script
- “Default” is the value assigned to the C# target variable if nothing is specified.
So we could get our build script to use something different to the default value using:
.\build.ps1 -target Clean // this would run the "Clean" task in our script, and all the tasks it depends on.
Customizing the build.cake script
Of course this build.cake file is just a sample to help me get started – I need to make a few changes for my own .NET Core 2 projects.
The build and deployment steps that I need to follow are listed below:
- Clean the existing binary, object and publish directories
- Restore missing nuget packages
- Build the .NET Core code
- Publish the application (targeting Windows or Ubuntu operating systems)
- Deploy the application (targeting Windows or Ubuntu operating systems)
I’m going to write a different Cake task for each of the steps above.
Modify the build.cake script to clean the build directories
This is a very simple change to the existing build.cake file – I can specify the binary, object and publish directories using C# syntax, and then make a minor change to the task called “Clean” (which already exists in the build.cake file we created earlier).
var binaryDir = Directory("./bin");
var objectDir = Directory("./obj");
var publishDir = Directory("./publish");

// ...
Task("Clean")
    .Does(() =>
    {
        CleanDirectory(binaryDir);
        CleanDirectory(objectDir);
        CleanDirectory(publishDir);
    });
Modify the build.cake script to restore missing nuget packages
Again, there’s a task already in the build.cake file which could do this job for us called “Restore-nuget-packages”. This would work, but I’d like to clearly signal in code that I’m using the normal commands for .NET Core projects – “dotnet restore”.
DotNetCoreRestore is a method built into Cake (see the source code here).
I created the C# variable to hold the name of my project (csproj) file, and can call the task shown below.
var projectFile = "./SamplePi.csproj";

// ...
Task("Restore")
    .IsDependentOn("Clean")
    .Does(() =>
    {
        DotNetCoreRestore(projectFile);
    });
Notice how I’ve specified a dependency in the code, which requires that the “Clean” task runs before the “Restore” task can start.
Modify the build.cake script to build the project
The methods that Cake uses to restore and build projects are quite similar – I need to specify C# variables for the project file, and this time also what version of the .NET Core framework that I want to target. Of course this task depends on the “Restore” task we just created – but notice that we don’t need to specify the dependency on “Clean”, because that’s automatically inferred from the “Restore” dependency.
We also need to specify the framework version and build configuration – I’ve specified them as parameters with defaults of “.netcoreapp2.0” and “Release” respectively.
var configuration = Argument("configuration", "Release");
var framework = Argument("framework", "netcoreapp2.0");

// ...
Task("Build")
    .IsDependentOn("Restore")
    .Does(() =>
    {
        var settings = new DotNetCoreBuildSettings
        {
            Framework = framework,
            Configuration = configuration,
            OutputDirectory = "./bin/"
        };

        DotNetCoreBuild(projectFile, settings);
    });
Modify the build.cake script to publish the project
This is a little bit more complex because there are different outputs depending on whether we want to target Windows (the win10-arm runtime) or Ubuntu (the ubuntu.16.04-arm runtime). But it’s still easy enough to do this – we just create an argument to allow the user to pass their desired runtime to the build script. I’ve decided to make the win10-arm runtime the default.
var runtime = Argument("runtime", "win10-arm");

// ...
Task("Publish")
    .IsDependentOn("Build")
    .Does(() =>
    {
        var settings = new DotNetCorePublishSettings
        {
            Framework = framework,
            Configuration = configuration,
            OutputDirectory = "./publish/",
            Runtime = runtime
        };

        DotNetCorePublish(projectFile, settings);
    });
Modify the build.cake script to deploy the project to Windows
I need to deploy to Windows and Ubuntu – I’ll consider these separately, looking at the easier one first.
As I mentioned earlier, it’s easy for me to deploy the published application to a device running Windows – since the device is on my network and I know the IP address, I can just specify the IP address of the device, and the directory that I want to deploy to. These can both be parameters that I pass to the build script, or set as defaults in the build.cake file.
var destinationIp = Argument("destinationPi", "192.168.1.125");
var destinationDirectory = Argument("destinationDirectory", @"c$\ConsoleApps\Test");

// ...

Task("Deploy")
    .IsDependentOn("Publish")
    .Does(() =>
    {
        var files = GetFiles("./publish/*");

        var destination = @"\\" + destinationIp + @"\" + destinationDirectory;
        CopyFiles(files, destination, true);

    });
Modify the build.cake script to deploy the project to Ubuntu
This is a bit more complex – remember that deploying from a Windows machine to an Ubuntu machine needs some kind of secure copy program. We also need to be able to modify the properties of some files on the remote device to make them executable. Fortunately a Cake add-in already exists which helps with both of these operations!
There are hundreds of add-ins for Cake – you can find more of them here and search the API here.
First, let’s structure the code to differentiate between deployment to a Windows device and deployment to an Ubuntu device. It’s easy enough to work out if we’re targeting the Windows or Ubuntu runtimes by looking at the start of the runtime passed as a parameter. I’ve written the skeleton of this task below.
Task("Deploy")
    .IsDependentOn("Publish")
    .Does(() =>
    {
        var files = GetFiles("./publish/*");

        if (runtime.StartsWith("win"))
        {
            var destination = @"\\" + destinationIp + @"\" + destinationDirectory;
            CopyFiles(files, destination, true);
        }
        else
        {
            // TODO: logic to deploy to Ubuntu goes here
        }
    });
I found an add-in for securely copying files called Cake.Putty – you can read more about the Cake.Putty library on Github here.
All we need to do to get Cake to pull the necessary libraries and tools is add one line to our build.cake script:
#addin "Cake.Putty"
That’s it – we don’t need to explicitly start any other downloads, or move files around – it’s very similar to how we’d include a “using” statement at the top of a C# class to make another library available in the scope of that class.
So next we want to understand how to use this add-in – I’ve found there’s good documentation on how to use the methods available in the plugin’s GitHub repository here.
From the documentation on how to use the PSCP command in the add-in, I need to pass two parameters:
- a string array of file paths as the first parameter, and
- the remote destination folder as the second parameter.
The second parameter is easy, but the first one is a bit tricky – there’s a function built into Cake called GetFiles(string path) but this returns an IEnumerable collection, which obviously is different to a string array – so I can’t use that.
But this is a great example of an area where I’m really able to take advantage of being able to write C# in the build script. I can easily convert the IEnumerable collection to a string array using LINQ, and pass this as the correctly typed parameter.
var destination = destinationIp + ":" + destinationDirectory;
var fileArray = files.Select(m => m.ToString()).ToArray();
Pscp(fileArray, destination, new PscpSettings
    {
        SshVersion = SshVersion.V2,
        User = username
    });
So now the deployment code has a very clear intent and easily readable to a C# developer – a great advantage of using Cake.
Finally, I can use Plink (also available in the Cake.Putty add-in) to make the application executable on the remote machine – again we need to specify the file to make executable, and the location of this file, which is straightforward.
var plinkCommand = "chmod u+x,o+x " + destinationDirectory + "/SamplePi";
Plink(username + "@" + destination, plinkCommand);
So now our deployment task is written in C#, and can deploy to Windows or Ubuntu devices, as shown below.
Task("Deploy")
    .IsDependentOn("Publish")
    .Does(() =>
    {
        var files = GetFiles("./publish/*");

        if (runtime.StartsWith("win"))
        {
            var destination = @"\\" + destinationIp + @"\" + destinationDirectory;
            CopyFiles(files, destination, true);
        }
        else
        {
            var destination = destinationIp + ":" + destinationDirectory;
            var fileArray = files.Select(m => m.ToString()).ToArray();
            Pscp(fileArray, destination, new PscpSettings
                {
                    SshVersion = SshVersion.V2,
                    User = username
                }
            );

            var plinkCommand = "chmod u+x,o+x " + destinationDirectory + "/SamplePi";
            Plink(username + "@" + destination, plinkCommand);
        }
    });
I’ve noticed that this add-in doesn’t handle file paths which have spaces in them – but it works if the full file path has no spaces.
One last thing – I’ve included the parameters for a Windows deploy all the way through this post – however, if I wanted to change these, I could override the defaults by passing them to the ScriptArgs switch using a command like the one below:
.\build.ps1
       -ScriptArgs '--runtime=ubuntu.16.04-arm',
                   '--os=ubuntu',
                   '--destinationPi=192.168.1.110',
                   '--destinationDirectory=/home/ubuntu/ConsoleApps/Test',
                   '--username=ubuntu',
                   '--executableName=SamplePi'
      -target Publish
I can pass values to the “-target” and “-configuration” parameters directly because they’re explicitly mentioned in the build.ps1 script – the rest have to be passed as a comma separated list of name-value pairs to the “-ScriptArgs” parameter. There’s a bit more on passing parameters to the build script on StackOverflow here.
I’ve pushed my new deployment scripts to GitHub here and the rest of this sample project to here.
Wrapping up
Cake allows me to write my build and deployment scripts in C# – this makes it much easier for developers who are familiar with C# to write automated deployment scripts. It also makes the dependencies between tasks really clear.
I’m much happier using this deployment mechanism rather than the one I had previously. Cake especially helped me to deploy from a Windows development environment to a device running an Ubuntu operating system – and the principles I’ve learned and written about here don’t just apply to Raspberry Pi devices, I could use them if I wanted to develop a website in .NET Core on my Windows machine, and deploy to a web server running Linux.
Footnote: I’ve written about an improvement to the deployment process to Windows 10 IoT Core here – robocopy makes things much faster
About me: I regularly post about .NET – if you’re interested, please follow me on Twitter, or have a look at my previous posts here. Thanks!

2 thoughts on “Automating .NET Core deployments to different platforms with Cake”
Comments are closed.