I usually work with Windows 10 IoT Core on my Raspberry Pi 3, but recently I’ve started to think about how I could use .NET Core (which is portable across Windows and Linux) with an Ubuntu installation on a Raspberry Pi 3.
I’ve written previously about running a .NET Core “hello world” application on a Pi 3 with Windows IoT core. This time I’ll write a post for a .NET Core application deployed to Ubuntu 16.04 from a Windows 10 machine – the post below describes:
- Installing Ubuntu 16.04 on a Raspberry Pi 3,
- Installing .NET Core 2
- Testing this installation
- Creating a “hello world” app which is targeted at Ubuntu
- Deploying this application to the Raspberry Pi 3, and
- Finally running the application.
There are a few posts about different parts of this already, but I wasn’t able to find a single post which described all the steps. I’m not very familiar with Linux so some of these steps might be really obvious to more skilled Linux users.
Since writing this, I’ve written another post about deploying .NET Core 2 C# apps to Linux distros for the Raspberry Pi – check it out here.
Install Ubuntu 16.04 LTS
Download Ubuntu for the Raspberry Pi 3 ARM Processor
You can download the zipped up image file from here – this is listed as “Ubuntu Classic Server 16.04 for the Raspberry Pi 3” on this page (shown below, highlighted in red).

Once you’ve downloaded this zipped file, you’ll need to extract it (using a tool such as 7-zip).
Format the SD Card
If you’ve a brand new card you might not need to format it, but if you’ve used your card for a previous installation, I think the easiest way to format a card is to use the diskpart tool which is shipped with Windows. I’ve previously blogged about how to do this at the link below:
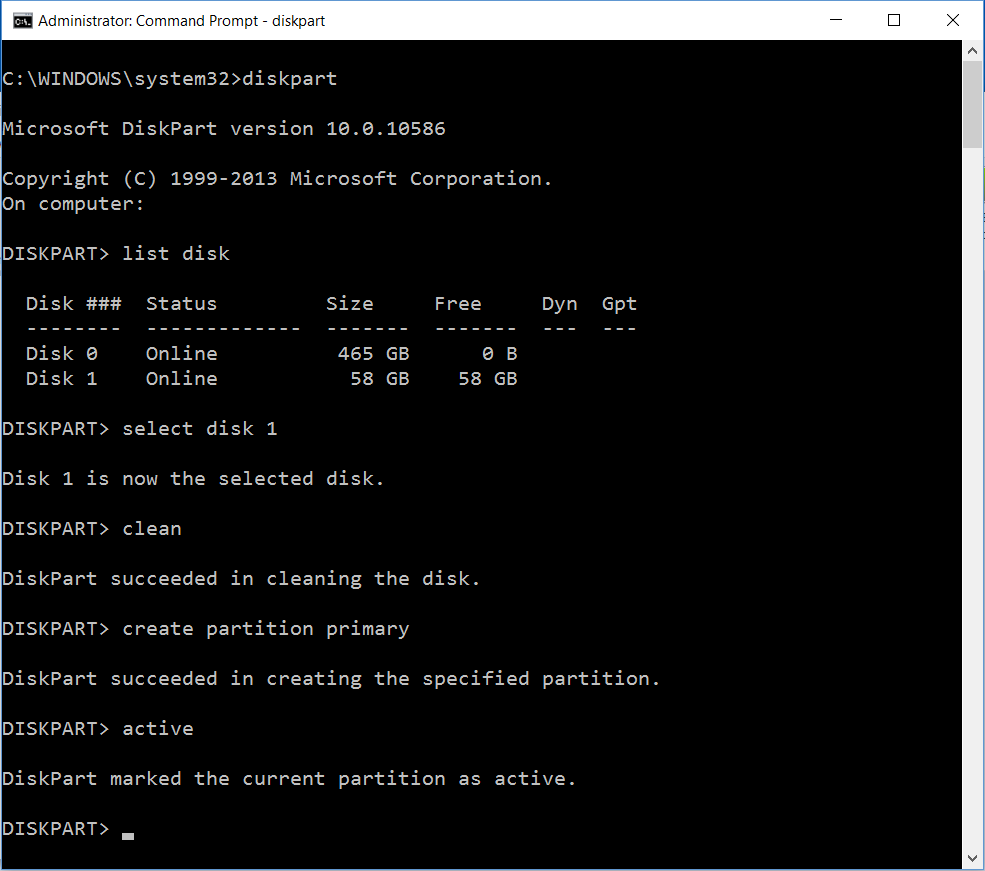
The image below shows a summary of how I formatted my disk:
- First I call diskpart
- Then I list the disks (using list disk)
- Then I select the disk which is my SD card (using select disk 1, though your number might be different)
- Then I clean the disk (using clean)
- This sometimes fails with a permission error – I find that just calling clean again solves the problem
- Then I create a primary partition on the cleaned disk (using create partition primary)
- Finally I make this partition active (using active).
Write the Ubuntu image to the SD Card
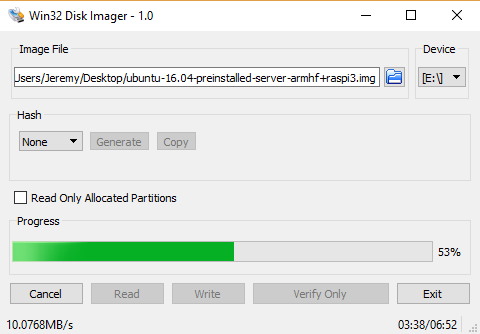
Now that I have an un-zipped Ubuntu 16.04 image and a clean SD card, I need to flash this image to the card. I did this using a tool called “Win32DiskImager” which I downloaded from https://sourceforge.net/projects/win32diskimager/. There’s more information about this tool here: https://wiki.ubuntu.com/Win32DiskImager.
Another cool application for doing this is Etcher.io.
I browsed to the image file after opening “Win32 Disk Imager”, selected the drive letter associated with my SD card, and then I clicked on the “Write” button. It took my machine about 7 minutes to flash the image to my SD card.
Insert the SD card to the Raspberry Pi 3 and boot
Now I insert the SD card into my Raspberry Pi 3, and connect the USB power supply. The easiest way to see what happens when you boot your Raspberry Pi 3 is to connect it to an HDMI monitor – I am lucky enough to have one of these monitor types.
However, I’ve also done this without a monitor – I happen to know that the wired IP address that my Raspberry Pi 3 always chooses is 192.168.1.125 – so if I insert the SD card into my Pi 3, and then switch it on, I know that if I run “ping 192.168.1.125 -t“, it’ll time out until the wired ethernet connects.
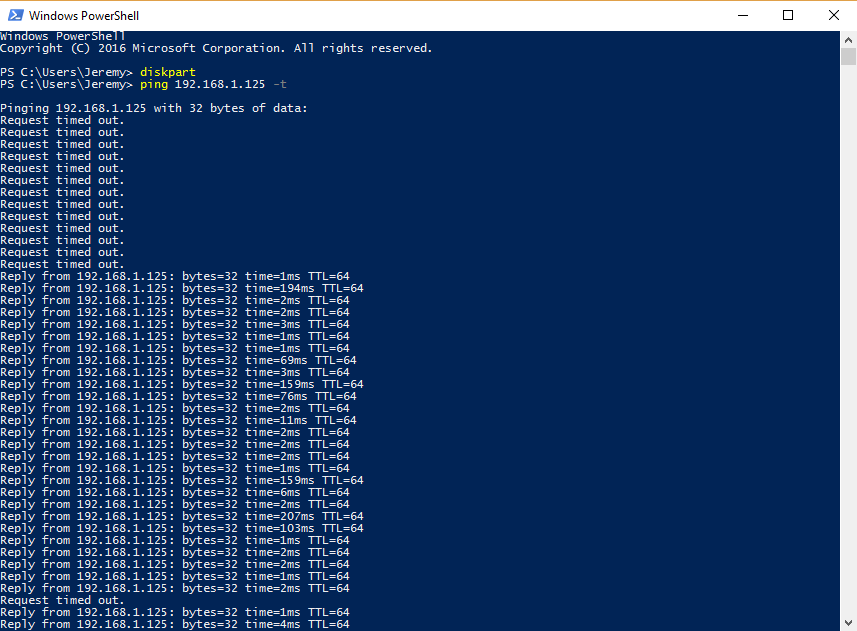
You might notice in the picture above that after the initial connection has been made, a few seconds later the connection drops once – I found this happens quite often, so before logging in with PuTTY I often leave the connection up for a few seconds to settle.
Connect to the Raspberry Pi 3 over ssh using PuTTY
I downloaded an installer for PuTTY from here – this allows me to SSH into my Raspberry Pi 3 from my Windows machine.
I find it helps to add the path to PuTTY to my machine path – I found the default path for the 64-bit installer to be “C:\Program Files\PuTTY“, which I then added to my machine’s path.
You can see your machine’s path from a PowerShell prompt using the command below:
Get-ChildItem -Path Env:Path | Select-Object -ExpandProperty Value
Once my path is updated, I’m able to type “putty” at a command prompt and a window opens like the one below:
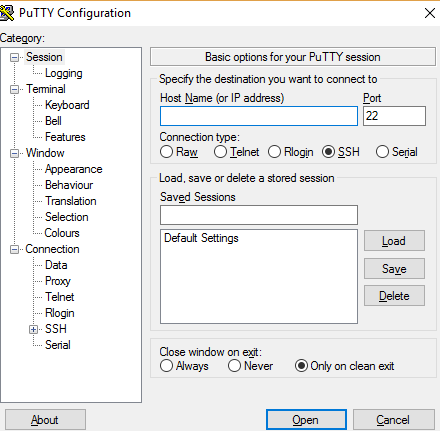
My Raspberry Pi 3 has IP address 192.168.1.125, and I typed this into the “Host Name” box in the window above. When I clicked on the “Open” button, the system shows me a window like the one below.
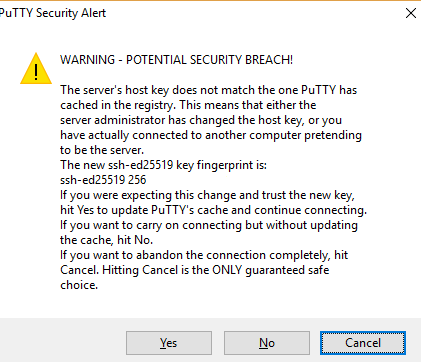
Since I was expecting this, I clicked on Yes, and a window opens asking for a username and password. The first time you log in, the username is ubuntu and the password is ubuntu. However, the first time you log in, you’ll be asked to change this password.
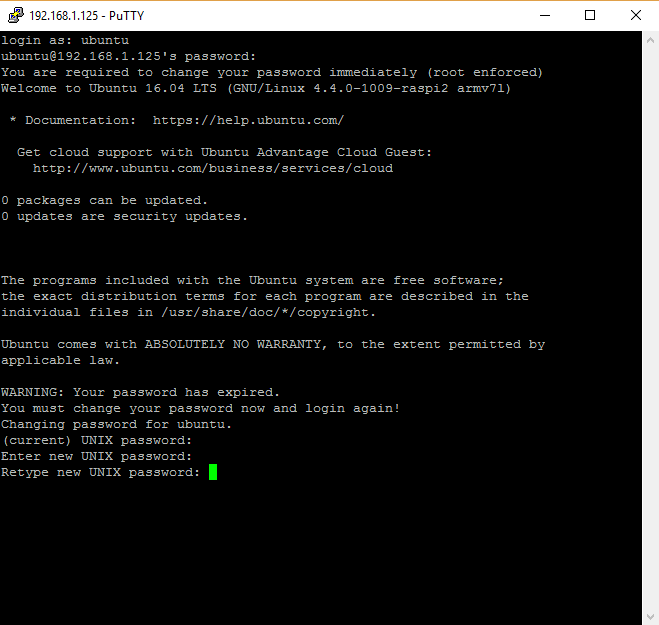
After I confirm the new password by typing it for a the second time, the PuTTY connection closes and I need to SSH in again – this time with the new password.
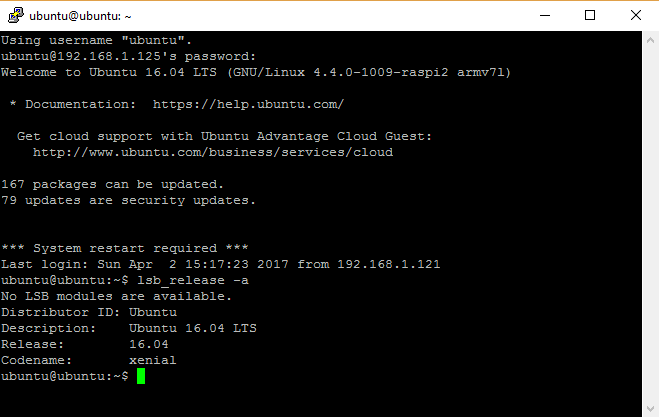
At this point Ubuntu 16.04 is installed onto the Raspberry Pi 3 and ready to be used – I can verify this by using the command below:
lsb_release -a
This prints distribution specific information, as shown below:
Install .NET Core 2 on the Raspberry Pi 3
Running .NET Core on Linux is not a surprising thing anymore – but generally these installations are on machines with an underlying x86 or x64 architecture. The Raspberry Pi 3 has an ARM 32-bit architecture, which makes things a little bit more unusual.
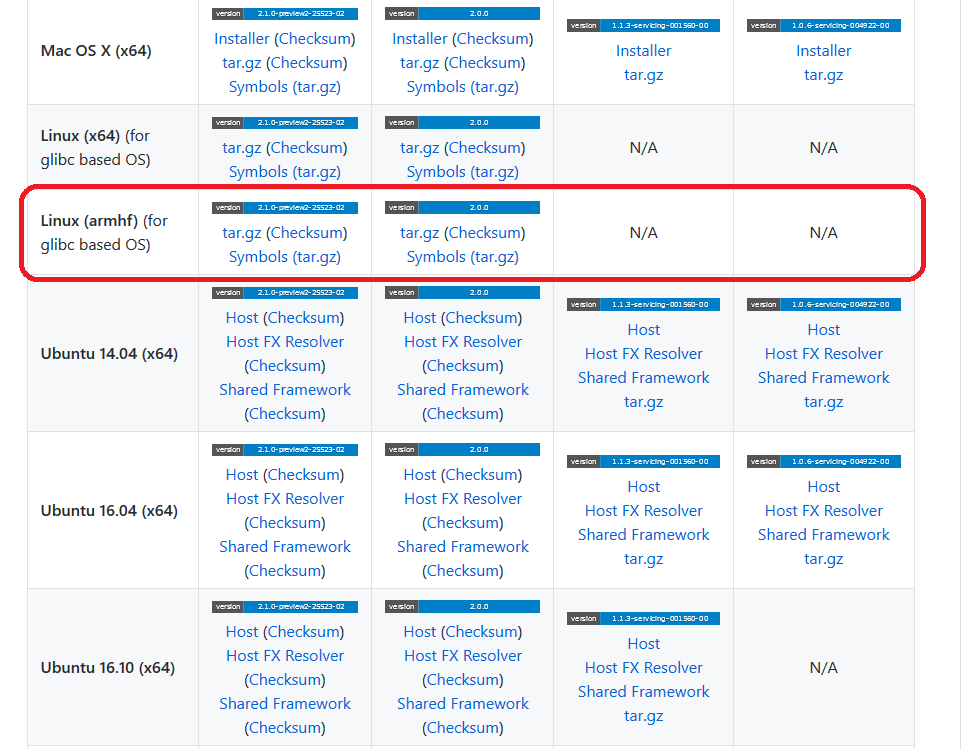
Fortunately there are some preview builds of .NET Core 2 which run on Ubuntu and an ARM 32-bit architecture, which are available at https://github.com/dotnet/core-setup/ (shown below).
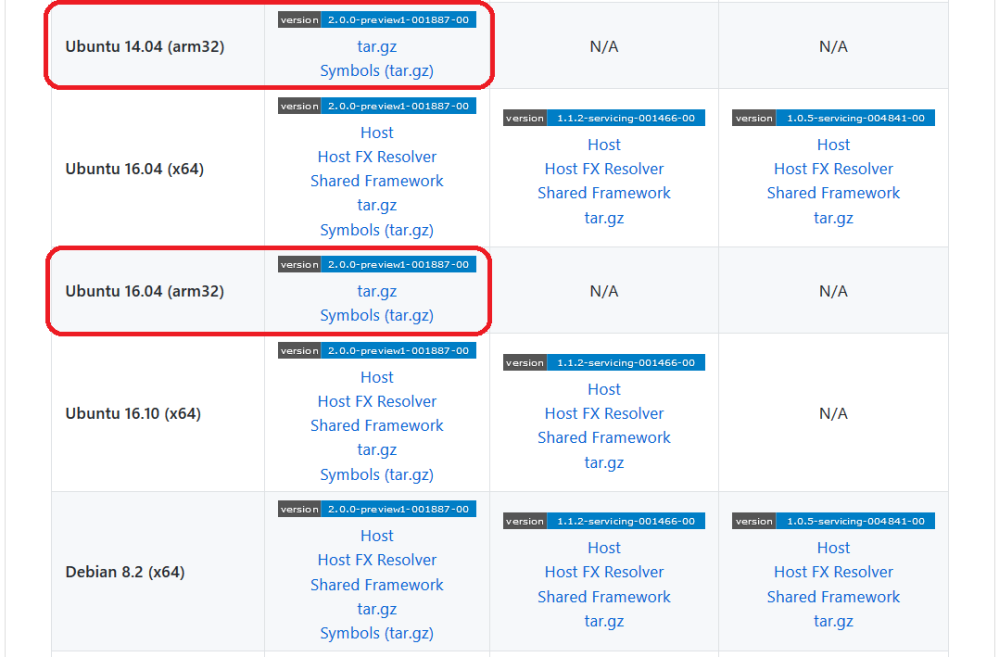
Update: Recently Microsoft updated this page – they’ve removed the Ubuntu specific builds and replaced them with a generic Linux built targetting ARM processor types.
This is way better than before – it means we can now deploy to Raspbian as well as Ubuntu!
This part is reasonably straightforward – as long as you know the right steps. I’ve found lots of web posts which mention a few of the steps below, but many of these leave me halfway through the process, or the steps present error messages.
I’ve commented the commands below which I’ve found consistently get me from a clean install of Ubuntu 16.04 on a Raspberry Pi 3 to a working installation of .NET Core 2.
# Update Ubuntu 16.04
sudo apt-get -y update

# Install the packages necessary for .NET Core
sudo apt-get -y install libunwind8 libunwind8-dev gettext libicu-dev liblttng-ust-dev libcurl4-openssl-dev libssl-dev uuid-dev

# Download the latest binaries for .NET Core 2
wget https://dotnetcli.blob.core.windows.net/dotnet/Runtime/release/2.0.0/dotnet-runtime-latest-linux-arm.tar.gz

# Make a directory for .NET Core to live in
mkdir /home/ubuntu/dotnet

# Unzip the binaries into the directory we just created
tar -xvf dotnet-runtime-latest-linux-arm.tar.gz -C /home/ubuntu/dotnet

# Now add the path to the dotnet executable to the environment path
# This ensures the next time you log in, the dotnet exe is on your path
echo "PATH=\$PATH:/home/ubuntu/dotnet" >> dotnetcore.sh
sudo mv dotnetcore.sh /etc/profile.d
Then run the command below to add the path to the dotnet executable to the current session
PATH=$PATH:/home/ubuntu/dotnet
Test the .NET Core 2 installation
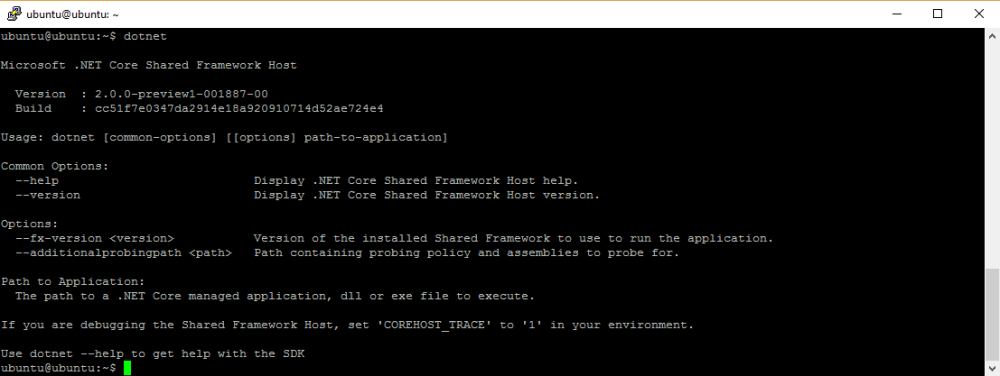
I can now test my installation by simply calling one command from my PuTTY prompt:
dotnet
When I call this, I can see that I have version 2.0.0-preview1-001887-00 installed.
Create a hello world .NET Core 2 app for Ubuntu 16.04 ARM 32
Installing .NET Core 2 is just the first step – now we have to create a working .NET Core 2 application which is targetted at Ubuntu 16.04.
Previously I’ve written about how to create a .NET Core 2 app on Windows, and deploy to a Raspberry Pi 3 running Windows 10 IoT Core here.
This post has all the instructions to create the executables targetted at Ubuntu – I’ll not repeat it all here. The tutorial creates an application called “coreiot” (because it’s an IoT application for .NET Core).
The block of code below shows the C# content of the application – running this application should print the text “Hello Internet of Things!”.
using System;

namespace RaspberryPiCore
{
    class Program
    {
        static void Main(string[] args)
        {
            Console.WriteLine("Hello Internet of Things!");
        }
    }
}
For an IoT application called “coreiot”, the command to create executables targetting Ubuntu 16.04 is:
dotnet publish -r ubuntu.16.04-arm
and all the files will be found in the folder:
\coreiot\bin\Debug\netcoreapp2.0\ubuntu.16.04-arm\publish
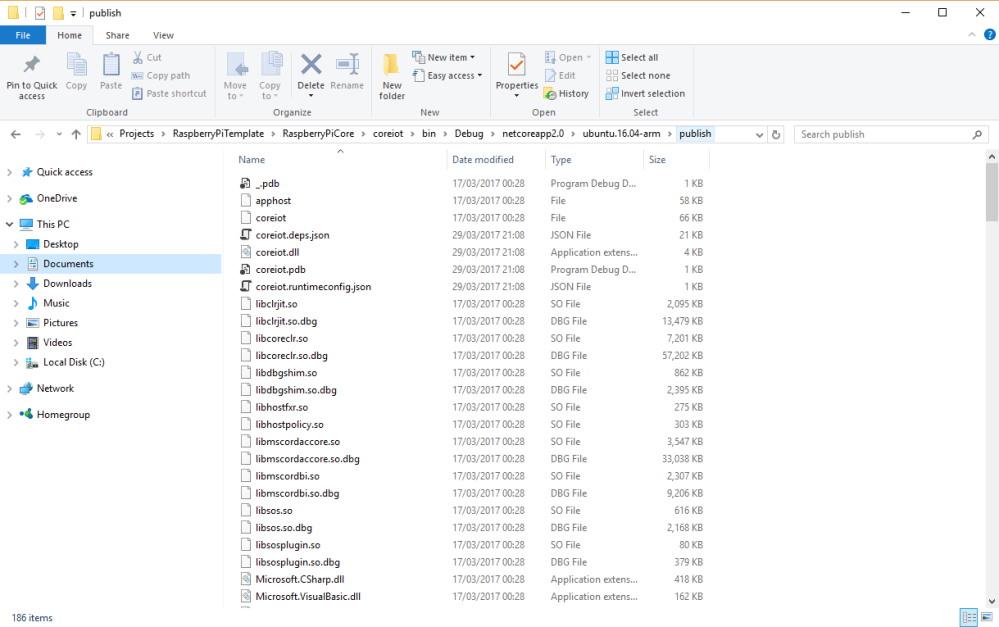
The next step is to deploy the files in this folder to the Raspberry Pi 3.
Deploy this application to the Raspberry Pi 3
First, I logged into the Raspberry Pi 3 using PuTTY and created a folder named “UbuntuHelloWorld”
mkdir UbuntuHelloWorld
One of the tools installed alongside PuTTY is call pscp, which allows files to be transferred from a Windows machine to Linux machine.
From my Windows machine where I compiled the .NET Core 2 application in the previous step, I opened Powershell and browsed to the \coreiot\bin\Debug\netcoreapp2.0\ubuntu.16.04-arm\publish folder.
I then run the command below.
pscp -r * ubuntu@192.168.1.125:/home/ubuntu/UbuntuHelloWorld
- The switch “-r” tells pscp to recursively copy.
- The “*” symbol tells pscp to copy everything
- “ubuntu@192.168.1.125:/home/ubuntu/UbuntuHelloWorld” is the destination, with “ubuntu” as the username, “192.168.1.125” as the IP address of the destination, and “/home/ubuntu/UbuntuHelloWorld” is the folder to copy files to.
After I run the command, I’m challenged for a password, and then the files are copied across from my Windows machine to my Raspberry Pi 3.

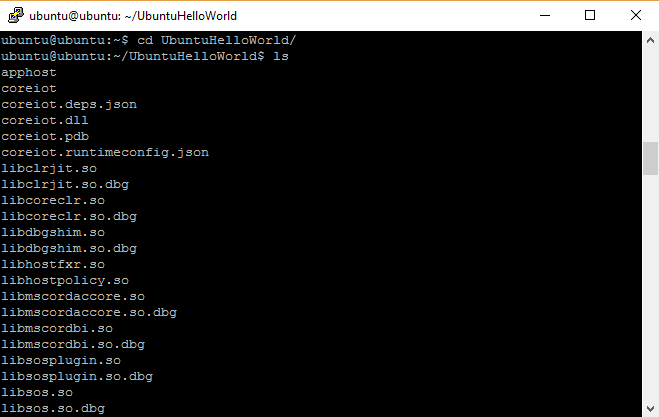
So now if I ssh into my Raspberry Pi 3 and look into the UbuntuHelloWorld folder, I can see all the files have been copied into this folder.
Finally, I need to make these files executable using the command below to allow me to run my .NET Core 2 application.
sudo chmod u+x *
Run the application
Now we’ve done all the hard work – it’s easy to run the application by just browsing to the UbuntuHelloWorld directory, and running the command:
./coreiot
As shown below, the application outputs the text “Hello Internet of Things!“.

Footnote: After writing this post, I created a nuget library which simplifies much of this – check out my post about using it here.
Summary
This has been a long post – I made a lot of mistakes on the way to finding this series of steps, but I’ve found following these reliably help me get Ubuntu and .NET Core 2 running on my Raspberry Pi 3.
About me: I regularly post about .NET – if you’re interested, please follow me on Twitter, or have a look at my previous posts here. Thanks!

One thought on “Installing Ubuntu 16.04 on a Raspberry Pi 3, installing .NET Core 2, and running a sample .NET Core 2 app”
Comments are closed.