I’ve been spending a lot of time recently working to improve developer’s experiences with writing cross platform code for the Raspberry Pi 3 using .NET Core 2.
In a previous post, I wrote about creating a simple .NET Core 2 console app for the Pi – you can see the code on GitHub here, or if you just want to install the template, just install the Nuget package by running the code below from a command line:
dotnet new -i RaspberryPiTemplate::*
And to create a new console project with this template, run the code from a command line:
dotnet new coreiot -n MyProject
I saw this very nice post from Laurent Kempe where he writes about creating an MVC application for the Raspberry Pi – there’s a bit of overlap in this post about WebAPI, particularly around modifying the csproj file, but there’s also a few subtle differences which made me think that WebAPI deserves its own post.
I’ve also started a project called Bifröst – this is a project for developers who want to write .NET Core 2 applications that use IoT devices, and want to target Ubuntu and Windows with the same code.
What about creating a WebAPI project for a Raspberry Pi 3?
First – make sure you have .NET Core 2 – I noticed that the status has changed from Beta to Preview recently, and you can download an installer from here.
Remember .NET Core 2 is not in official release – you’re living on the edge using these latest builds of code from Microsoft!

The easy way – use the pre-baked templates from Nuget
If you just want to install a template from Nuget, run the code below at a command line;
dotnet new -i RaspberryPi.WebApi::*
Once you’ve installed this template, you can browse to where you’d like your project to be created and run the command below (obviously if you don’t want to call your project “MyProject”, choose a different name).
dotnet new piwebapi -n MyProject
This will create a .NET Core 2 WebAPI project called “MyProject”, which can be deployed to a Raspberry Pi running Windows 10 or Ubuntu. There are a bunch of deployment PowerShell scripts in the root, and you can read a bit more about them here.
If you want to look at a sample project which is created from this template, I’ve created a sample one on GitHub here.
If you’re deploying to Windows 10 IoT Core, remember to open a port in the firewall to allow connections – my sample template uses port 5000 and can be opened using the code below if you ssh into your Pi.
netsh advfirewall firewall add rule name="ASPNet Core 2 Server Port" dir=in action=allow protocol=TCP localport=5000
Or try the hard way – cook your own project
It’s not actually that hard – creating a WebAPI project for the Raspberry Pi 3 ARM processor is very similar to creating a standard WebAPI project for an x86/x64 machine, with a few small tweaks to the code.
After you’ve got .NET Core 2 installed, open a command line where you want your project to live and run the line of code below (again, obviously if you don’t want to call your project “MyProject”, choose a different name).
dotnet new webpi -n MyProject
When the project is created, open the root folder (which will be called MyProject) and edit the MyProject.csproj file. Look for the ProjectGroup node which should look like the code below:
  <PropertyGroup>
    <TargetFramework>netcoreapp2.0</TargetFramework>
  </PropertyGroup>
And add two additional notes – RuntimeFrameworkVersion and RuntimeIdentifiers:
  <PropertyGroup>
    <TargetFramework>netcoreapp2.0</TargetFramework>
    <RuntimeFrameworkVersion>2.0.0-preview1-002028-00</RuntimeFrameworkVersion>
    <RuntimeIdentifiers>win8-arm;ubuntu.14.04-arm;ubuntu.16.04-arm</RuntimeIdentifiers>
  </PropertyGroup>
Now look at the project’s Program.cs file, and add the line of code:
.UseUrls("http://*:5000")
to the main method, as shown below:
public class Program
{
    public static void Main(string[] args)
    {
        var host = new WebHostBuilder()
            .UseKestrel()
            .UseContentRoot(Directory.GetCurrentDirectory())
            .UseIISIntegration()
            .UseUrls("http://*:5000")
            .ConfigureAppConfiguration((context, configBuilder) => {
                configBuilder
                    .AddJsonFile("appsettings.json", optional: false, reloadOnChange: true)
                    .AddJsonFile($"appsettings.{context.HostingEnvironment.EnvironmentName}.json", optional: true)
                    .AddEnvironmentVariables();
            })
            .ConfigureLogging(loggerFactory => loggerFactory
                .AddConsole()
                .AddDebug())
            .UseStartup<Startup>()
            .Build();

        host.Run();
    }
}
I noticed one strange thing when generating the code using the WebAPI template – the main method calls a ConfigureConfiguration method, but this causes a compiler error against the most recent version of .NET Core 2 – I had to update this code to ConfigureAppConfiguration (in green in the code above). So watch out for that.
Building and deploying to a Raspberry Pi 3
First, build this project in the normal way – browse to the directory that you’ve created your project and run:
dotnet restore .

dotnet build .
Next, publish the application – the target depends on whether you want to run on a Raspberry Pi with Windows 10 or Ubuntu 16.04.
Publish targetting Ubuntu 16.04:
dotnet publish . -r ubuntu.16.04-arm
Publish targetting Windows 10:
dotnet publish . -r win8-arm
Deploy to Ubuntu 16.04
- Install PuTTY (which also installs tools called pscp and plink, which we need). Add the PuTTY install directory to your Windows’ machine path.
- The userid you used to log into your Pi – mine is ubuntu.
- Create a directory on your Raspberry Pi to deploy the WebAPI code to – I’ve created on called “PiWebApi” which is at “/home/ubuntu/PiWebApi“.
- The IP address of your Raspberry Pi – make sure your Raspberry Pi is logged in and connected to your local network – my Ubuntu Pi’s IP address is 192.168.1.110
Now run the command below to copy the binaries from your Windows development machine to the remote Raspberry Pi 3.
pscp.exe -r .\bin\Debug\netcoreapp2.0\ubuntu.16.04-arm\publish\* ubuntu@$192.168.1.110:/home/ubuntu/PiWebApi
Then run the command below from your development machine to make the binary executable on the Raspberry Pi.
plink.exe -v -ssh ubuntu@192.168.1.110 chmod u+x,o+x /home/ubuntu/PiWebApi/MyProject
./home/ubuntu/PiWebApi/MyProject
Hosting environment: Production
Content root path: /home/ubuntu/PiWebApi
Now listening on: http://[::]:8000
Application started. Press Ctrl+C to shut down.
Deploy to Windows 10 IoT Core
- Create a directory on your Raspberry Pi to deploy the WebAPI code to – I’ve created on called “PiWebApi” which is at “C$/PiWebApi“.
- Get the IP address of your Raspberry Pi – make sure you’ve logged into your Raspberry Pi and connected to your local network – my Windows 10 Pi’s IP address is 192.168.1.125
From a command prompt opened at the root of your WebAPI project, run the code below to copy the binaries from your development machine to your Pi:
xcopy.exe /y ".\bin\Debug\netcoreapp2.0\win8-arm\publish" "\\192.168.1.125\C$\PiWebApi"

netsh advfirewall firewall add rule name="ASPNet Core 2 Server Port" dir=in action=allow protocol=TCP localport=5000
./MyProject.exe
Hosting environment: Production
Content root path: C:\PiWebApi
Now listening on: http://[::]:5000
Application started. Press Ctrl+C to shut down.
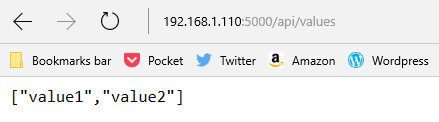
And again you can browse to the address below to see the Raspberry Pi server returning values from the HTTP GET request:

Footnote: There’s presently (26-Apr-17) an issue with some WebAPI calls in .NET Core 2, logged on GitHub with more information here. I’ve found that Kestrel throws an exception the first time I hit the the api/values/1 url, but it works the second time I hit the URL. Hopefully this’ll be diagnosed and fixed soon.

You must be logged in to post a comment.